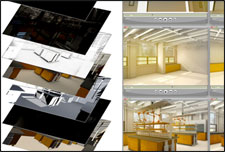
Animation
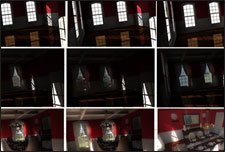
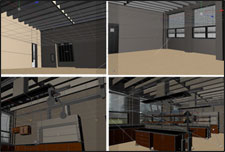
Architectural Walkthrough
Take a step inside.
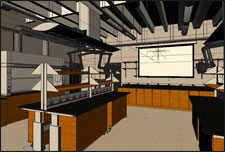
Nothing lures the imagination like being able to fully explore what you’ve created. With our architectural walkthrough service, your designs will be transformed into captivating 3D movies, complete with visual effects and background music, for a truly immersive experience.
Want to bring a new dimension to your designs? Call us now on (216) 359-1003 and find out what we can do for you.
Architectural Walkthrough Workflow
| Step 01 |
Step 02 |
Step 03 |
Step 04 |
Step 05 |
| Project Information | 3D Modeling | Texturing | Lighting | Animation |
| Once we receive all the necessary materials and specifications from you for your project, we’ll create a custom quote for you. Upon approval, we are ready to begin modeling. | The first technical step of the 3D process is modeling the whole geometry of your subject. | Once your architectural geometry has been modeled in 3D space, we begin the texturing process. | Lighting the model is a crucial step in the animation process. We choose the appropriate type of light for the purpose, test render the lights and adjust them as needed. | Now we make it move! We track, scroll and dolly cameras through the scene we have built, then dial in the keyframes. Once we’re ready, we’ll provide you with a hardware preview to approve before rendering can begin. |
 |
 |
 |
 |
 |
| Step 06 |
Step 07 |
Step 08 |
Step 09 |
| Rendering | Compositing | Sound Design | Proofs |
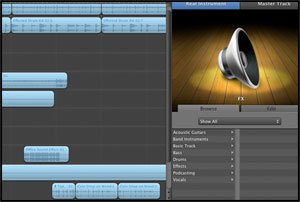
| Rendering is the final process of creating the 2D images that are the basis of your animation. Each frame of the animation is rendered in multiple passes such as diffuse, shadow, ambient occlusion, and reflection. | In the compositing/post-production stage, thousands of individual multi-pass layers are brought together to form your 3D animation. We’ll add color correction, adjustment layers, tints, blurs and lighting effects to give your animation more dynamism and impact. | In the sound design stage, we’ll incorporate music with your visuals. The music score will help your animation, drawing out subtle emotions and enhancing the atmosphere for your audience. | Once your final animation has been refined to presentation quality, we’ll send you a link to your digital proof. Once you’re happy with the work, we upload the final artwork to you, leaving you with an animation that captures the heart of your concepts. |
 |
 |
 |
 |
Architectural Walkthrough Specs
Please upload as much information as you have available when getting started on your project.
| Reference Materials | Description | ||
|---|---|---|---|
| On-Angle Photographic or 3D |
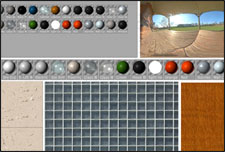
Photographic or 3D reference material that is in the exact same angle of view as the final illustration. We accept high resolution photographs, and the following file types: Sketchup models, Vectorworks BIM, CAD 3D, Cinema 4D, and OBJ files with the camera positioned in the exact location for the final composition. | ||
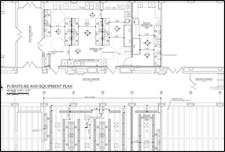
| Blueprints | Electronic blueprint reference: site plan, floor plan, elevations, roof/ceiling plan, and section views. Review the checklist below for blueprint reference materials that are required for interior and exterior architectural illustrations. Package all relevant project materials into a zip file and upload when requesting a quote. | ||
| Interior Specs | Exterior Specs | ||
***Dimensions are required on all project specs.
|
***Dimensions are required on all project specs.
|
||
| Off-Angle Photographic | Reference photos or sketches that were not shot or drawn at the same angle as the final illustration. | ||
STEP 3: Upload Project SpecsPlease zip your project specifications into one file and click “Submit File.” Do not leave the page while your files are uploading. File size limit is 50MB, for larger files please use www.YouSendIt.com and send files to [email protected] with your project name in the subject line.
|
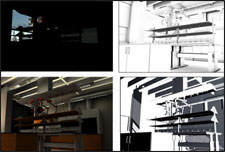
Exploded View
Boom!
Want to make a real impression with your products? Blast them apart and make an explosive impact. We’ll take your designs and blow them to pieces. When we’re done, you’ll have visually stunning images, clearly showing your design processes and how you’ve constructed your project.
Set things off today. Call us now on (216) 359-1003 and discover how you can spark off your client’s imagination.
Exploded View Workflow
| Step 01 |
Step 02 |
Step 03 |
Step 04 |
Step 05 |
| Project Information | 3D Modeling | Texturing | Lighting | Animation |
| Once we receive all the necessary materials and specifications from you for your project, we’ll create a custom quote for you. Upon approval, we are ready to begin modeling. | The first technical step of the 3D process is modeling the whole geometry of your subject. | Once your architectural geometry has been modeled in 3D space, we begin the texturing process. | Lighting the model is a crucial step in the animation process. We choose the appropriate type of light for the purpose, test render the lights and adjust them as needed. | Now we make it move! We track, scroll and dolly cameras through the scene we have built, then dial in the keyframes. Once we’re ready, we’ll provide you with a hardware preview to approve before rendering can begin. |
|
|
|
|
|
| Step 06 |
Step 07 |
Step 08 |
Step 09 |
| Rendering | Compositing | Sound Design | Proofs |
| Rendering is the final process of creating the 2D images that are the basis of your animation. Each frame of the animation is rendered in multiple passes such as diffuse, shadow, ambient occlusion, and reflection. | In the compositing/post-production stage, thousands of individual multi-pass layers are brought together to form your 3D animation. We’ll add color correction, adjustment layers, tints, blurs and lighting effects to give your animation more dynamism and impact. | In the sound design stage, we’ll incorporate music with your visuals. The music score will help your animation, drawing out subtle emotions and enhancing the atmosphere for your audience. | Once your final animation has been refined to presentation quality, we’ll send you a link to your digital proof. Once you’re happy with the work, we upload the final artwork to you, leaving you with an animation that captures the heart of your concepts. |
|
|
|
|
Exploded View Specs
Please upload as much information as you have available when getting started on your project.
| Reference Materials | Description | ||
|---|---|---|---|
| On-Angle Photographic or 3D |
Photographic or 3D reference material that is in the exact same angle of view as the final illustration. We accept high resolution photographs, and the following file types: Sketchup models, Vectorworks BIM, CAD 3D, Cinema 4D, and OBJ files with the camera positioned in the exact location for the final composition. | ||
| Blueprints | Electronic blueprint reference: site plan, floor plan, elevations, roof/ceiling plan, and section views. Review the checklist below for blueprint reference materials that are required for interior and exterior architectural illustrations. Package all relevant project materials into a zip file and upload when requesting a quote. | ||
| Interior Specs | Exterior Specs | ||
***Dimensions are required on all project specs.
|
***Dimensions are required on all project specs.
|
||
| Off-Angle Photographic | Reference photos or sketches that were not shot or drawn at the same angle as the final illustration. | ||
STEP 3: Upload Project SpecsPlease zip your project specifications into one file and click “Submit File.” Do not leave the page while your files are uploading. File size limit is 50MB, for larger files please use www.YouSendIt.com and send files to [email protected] with your project name in the subject line.
|
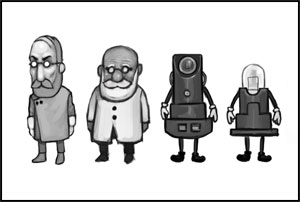
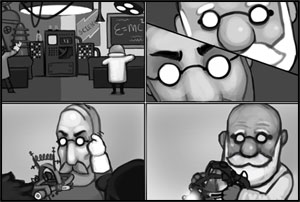
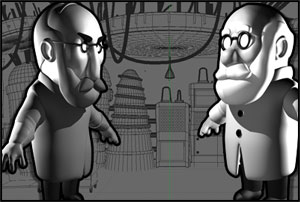
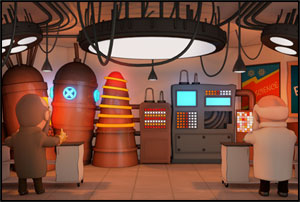
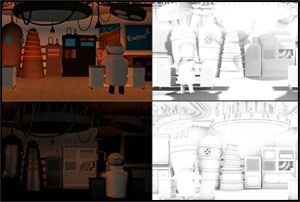
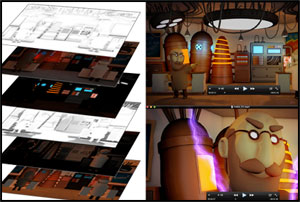
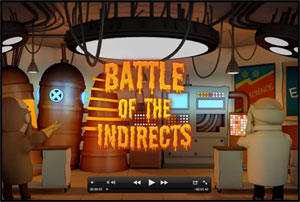
Character Animation
Emotion in motion.
Bring characters that breathe with life and energy to your presentations. With our character animation service, we’ll design believable, lifelike animations that capture the spirit of your brand and tell a story that shines.
Call us today on (216) 359-1003. We’ll help you imagine and create characters with personality and a compelling message.
Character Animation Workflow
| Step 01 |
Step 02 |
Step 03 |
Step 04 |
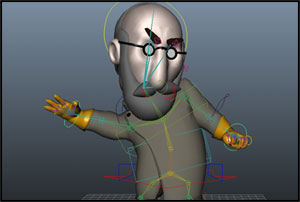
| Project Information | Character Design | Storyboard | 3D Modeling |
| Once we receive all the necessary materials and specifications from you for your project, we’ll create a custom quote for you. Upon approval, we are ready to begin designing your characters. | Based on your character descriptions, we begin the process of developing the look of your characters. | Once the character designs are fully developed, we sketch out a storyboard based on the script. The storyboard will include sketches for the movement of the characters, camera angles, and overall look and feel of the environments. | The first technical step of the 3D process is modeling the geometry of your characters and environment. |
 |
 |
 |
 |
| Step 05 |
Step 06 |
Step 07 |
Step 08 |
| Texturing | Rigging & Animation | Lighting | Rendering |
| Once your characters and environment have been modeled in 3D space, we begin the texturing process. | With the characters created in 3D, we begin rigging and animation. Rigging is the process of assigning joints to specific parts of the character in order to make it move. Once each character has been rigged, we animate it inside of its respective environment based on the script. | Lighting the model is a crucial step in the animation process. We choose the appropriate type of light for the purpose, test render the lights and adjust them as needed. | Rendering is the final process of creating the 2D images that are the basis of your animation. Each frame of the animation is rendered in multiple passes such as diffuse, shadow, ambient occlusion, and reflection. |
 |
 |
 |
 |
| Step 09 |
Step 10 |
Step 11 |
| Compositing | Sound Design | Final Proofs |
| In the compositing/post-production stage, thousands of individual multi-pass layers are brought together to form your 3D animation. We’ll add color correction, adjustment layers, tints, blurs and lighting effects to give your animation more dynamism and impact. | In the sound design stage, we’ll incorporate music with your visuals. The music score will help your animation, drawing out subtle emotions and enhancing the atmosphere for your audience. | Once your final animation has been refined to presentation quality, we’ll send you a link to your digital proof. Once you’re happy with the work, we upload the final artwork to you, leaving you with an animation that captures the heart of your concepts. |
 |
 |
 |
Character Animation Specs
Please upload as much information as you have available when getting started on your project.
- Script, voiceover dialog, storyline
- Stage/environment description
- Character descriptions and character inspiration images
- Vector Logo in Adobe Illustrator format (if applicable to your animation project)
- Brand Colors
- Product Model and/or character models (if applicable) as C4D or OBJ file extension.
STEP 3: Upload Project SpecsPlease zip your project specifications into one file and click “Submit File.” Do not leave the page while your files are uploading. File size limit is 50MB, for larger files please use www.YouSendIt.com and send files to [email protected] with your project name in the subject line.
|
Contact Info
Payments Accepted

Get Social